from Daily Photo Tips https://ift.tt/3eWPZ2G
via IFTTT
Today’s DSLR photo tip continues with our series of tips covering functions on your camera that you’re most likely not using. Let’s talk about back button focusing.
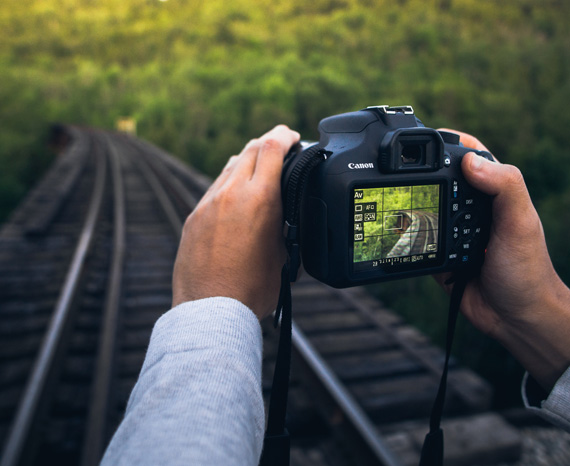
Normally, to focus on a subject, we pick the focal point we want, then depress the shutter button halfway. This sets the auto focus (and the exposure, if you aren’t using manual mode). Then we recompose the shot so that the focal point is where we want it in the frame and depress the button the rest of the way to fire the shutter. Most of the time, this is OK. But in certain instances, it can be a real pain in the patootie!

Photo by Warren Wong; ISO 400, 1/60-second exposure.
Have you ever tried to photograph a scene in low light conditions? Often the lens can’t find the focal point and will keep moving back and forth trying to find something to focus on. By the time it actually does focus on something, the shot has long since passed. Not to mention that the final focus isn’t always where you want it to be.
Speaking of the final focus point not being where you want it to be…
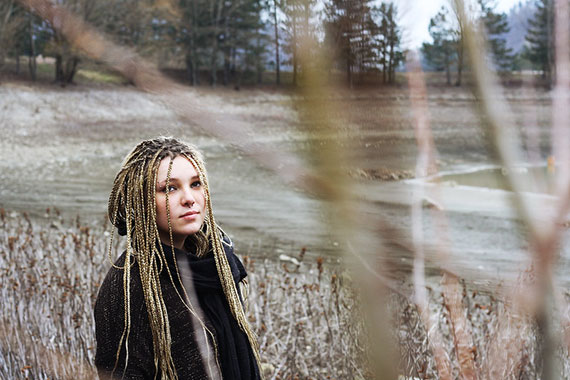
I’m specifically thinking of a shoot where I was trying to get a portrait of a young girl with a bunch of tree branches and leaves framing her face and body. My lens kept focusing on the branches, and I had a heck of a time getting the girl in focus for each shot.

Photo by Elisa Paolini; ISO 200, f/5.6, 1/100-second exposure.
Or, what if for some reason you want your photo to be out of focus? This is common in stock photos. The photo subject is out of focus and they later add in a sharp focus product image and sales copy.
Or what if you’ve got a moving target like a kid on a swing? You will want to focus on one spot and shoot every time the kid hits that location. If your lens refocuses every time, you are most likely going to miss the shot.
In the same vein, what if you are at a race of some sort. You’ve picked an ideal spot. The background is perfect, and as the bicyclers or cars or runners round a corner, the action is at its peak! To get the shot, you will want to focus on one spot and shoot as your subject gets there—and not have to refocus every time.
One way to handle the problem is to use manual focus. This requires that you turn the focus ring on the lens to manually set the focus. There is a danger here in that you may inadvertently change the exposure. (Don’t discount this, I’ve done it!)
But the biggest reason to avoid manual focus is that many of us don’t have the best eyes, and autofocus is just plain better. This is one of the few times I recommend an auto setting over manual.
A better way (than manual focus) is to use back button focusing.
What this does is remove the focusing function from the shutter button and move it to another button. Most DSLR cameras have added a button on the back of the camera for this function. (That’s why it is called back button focusing.)
In other words, once you set up your camera for back button focusing, when you depress the shutter half way, it doesn’t affect the focus. You can focus with the back button and the focus point will stay the same no matter how many shots you take and even if you change the exposure settings.

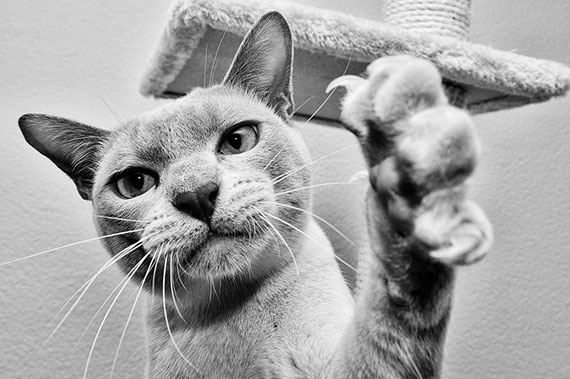
Photo by Tjarko Busink
Now, in that low light situation, you set the focus once and you don’t have to keep re-finding it. You can set your focus to have blurry shots if you want them, and pre-focusing on a certain spot is no problem.
It seems that the menu settings are slightly different for all the various models of camera, so it would be a waste to try and describe the settings here. Sorry, but you are going to have to bite the bullet and actually read your manual.
Once you’re comfortable with back button focusing, you will most likely leave your camera on those settings, but it can easily be changed back and forth to fit the situation.
Practice changing the settings back and forth so you are comfortable with them and can select the way you want to focus on any particular session.
About the Author
Dan Eitreim writes for ontargetphototraining.com. He has been a professional photographer in Southern California for over 20 years. His philosophy is that learning photography is easy if you know a few tried and true strategies.
Go to full article: DSLR Photo Tip: What The Heck Is Back Button Focus?
What are your thoughts on this article? Join the discussion on Facebook
PictureCorrect subscribers can also learn more today with our #1 bestseller: The Photography Tutorial eBook
The post DSLR Photo Tip: What The Heck Is Back Button Focus? appeared first on PictureCorrect.
The best thing about light painting is creative freedom. While we treat lack of light as a challenge in most genres of photography, that is totally not the case with light painting. Using your own source of light as a paintbrush, you gain the ability to paint whatever’s in your mind. You control what appears in the final image and are limited only by your own creativity. Take the following image by photographer Nikolay. The level of creativity is simply mind-blowing:
Nikolay shot the image on the Olympus OM-D EM1 with an 12-40mm f/2.8 Pro lens at f/3.2 and ISO 200 using the live composite mode. For the lighting, he used an LED flashlight and a double light blade.
While some can feel that the image is trippy with a psychedelic vibe, others feel it’s kind of spooky. It’s the look of an octopus in the middle of the woods that gives the eerie vibe to the image. It’s scary how it appears like the arms of an octopus emerging from the roots of the trees.
What do you see when you look at this image?
Go to full article: Interesting Photo of the Day: Light-Painted Forest Octopus
What are your thoughts on this article? Join the discussion on Facebook
PictureCorrect subscribers can also learn more today with our #1 bestseller: The Photography Tutorial eBook
The post Interesting Photo of the Day: Light-Painted Forest Octopus appeared first on PictureCorrect.
The world beneath the water’s surface is so amazing that you can rarely go wrong when capturing photos of it. Similarly, astrophotography is another genre that is not suited for everyone. However, in this genre of photography too, there’s a great potential to end up capturing images that are simply—and literally—out of this world. Let’s join photographer Pierre T. Lambert as he has his hands on with both of these fabulous genres of photography:
Lambert takes us through a spectacular behind the scenes journey of his beautiful trip underwater in a coral nursery. You can see in the video how he uses rolling waves, fantastic sunlight breaking into the water and beautiful corals to capture mindblowing images.
If underwater photography was not challenging enough during the daytime, Lambert also shows how he managed to take some more thought-provoking images during the night. The way he and his team work together is simply amazing.
Be sure to stick around until the end of the video. He also shares how he was able to photograph the Milky Way from the beach without a tripod. Can you believe that he shot those images at 1/5 seconds handheld and still managed to get some decent images? Kudos to his steady hands and the camera’s stabilization system!
Go to full article: Behind the Scenes of an Underwater & Astro Photoshoot
What are your thoughts on this article? Join the discussion on Facebook
PictureCorrect subscribers can also learn more today with our #1 bestseller: The Photography Tutorial eBook
The post Behind the Scenes of an Underwater & Astro Photoshoot appeared first on PictureCorrect.
Photographer and educator Karl Taylor believes that parabolic softboxes are nothing more than marketing and that any conventional softbox can achieve the same results. In this 10.5-minute video, he proves it.
“It never ceases to amaze me how certain products are created purely for marketing reasons,” Taylor says. “When in fact they have no physical or practical advantage whatsoever over existing products.”
He says that parabolic softboxes are a perfect example of this.
“They hijacked the word ‘parabolic’ from parabolic reflectors and merged it with the word softbox to make a mockery of the laws of physics. They take up three times more space in your studio than necessary, are much heavier and more cumbersome, and they don’t deliver anything different.”
At first, Taylor thought that there must be some advantage of the parabolic softbox design that he wasn’t seeing that would make it different from a standard octagonal softbox. He performed a couple of tests with each light modifier, with the front and middle diffusor on, with only the middle diffusor on, and finally a bare bulb.
Taylor laments the size and weight of the parabolic and seems genuinely angry at the existence of the device. His results show that with any diffusion in front of the bulb, there is virtually no difference between the two light shaping tools.
There is a slight difference between the bare bulb shots, though. Given the shape and materials the two boxes are made of, this is an expected result:
In the rest of the video, Taylor shows how you can get the same look provided by the bare bulb parabolic above with a lot less cumbersome equipment.
It is important to note that Taylor does not dislike the idea of a parabolic reflector, but the parabolic softbox. A true parabolic reflector has the light facing inwards, towards the back of the dome, and is on a rod to allow you to adjust the focusing of the light. These parabolic softboxes do not have that feature, and when diffusing the light out like is most common, there is no reason for them to exist when the octobox achieves the same result more easily and, often, for less money.
Do you agree with Taylor’s stance? Let us know in the comments. For more from Karl Taylor, subscribe to his YouTube Channel.
(via ISO 1200)