from Daily Photo Tips https://ift.tt/3eWPZ2G
via IFTTT
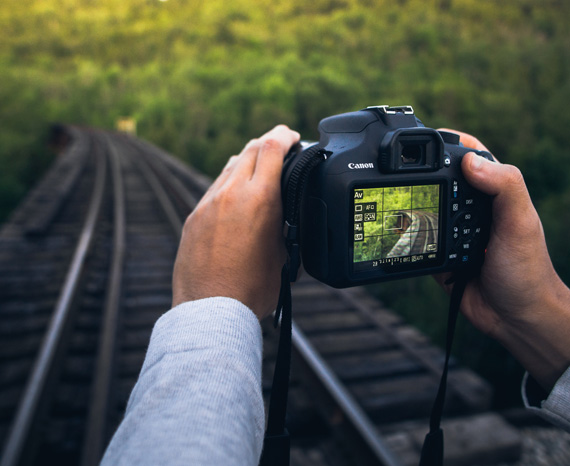
Today’s DSLR photo tip continues with our series of tips covering functions on your camera that you’re most likely not using. Let’s talk about back button focusing.
Normally, to focus on a subject, we pick the focal point we want, then depress the shutter button halfway. This sets the auto focus (and the exposure, if you aren’t using manual mode). Then we recompose the shot so that the focal point is where we want it in the frame and depress the button the rest of the way to fire the shutter. Most of the time, this is OK. But in certain instances, it can be a real pain in the patootie!
Photo by Warren Wong; ISO 400, 1/60-second exposure.
Have you ever tried to photograph a scene in low light conditions? Often the lens can’t find the focal point and will keep moving back and forth trying to find something to focus on. By the time it actually does focus on something, the shot has long since passed. Not to mention that the final focus isn’t always where you want it to be.
Speaking of the final focus point not being where you want it to be…
I’m specifically thinking of a shoot where I was trying to get a portrait of a young girl with a bunch of tree branches and leaves framing her face and body. My lens kept focusing on the branches, and I had a heck of a time getting the girl in focus for each shot.
Photo by Elisa Paolini; ISO 200, f/5.6, 1/100-second exposure.
Or, what if for some reason you want your photo to be out of focus? This is common in stock photos. The photo subject is out of focus and they later add in a sharp focus product image and sales copy.
Or what if you’ve got a moving target like a kid on a swing? You will want to focus on one spot and shoot every time the kid hits that location. If your lens refocuses every time, you are most likely going to miss the shot.
In the same vein, what if you are at a race of some sort. You’ve picked an ideal spot. The background is perfect, and as the bicyclers or cars or runners round a corner, the action is at its peak! To get the shot, you will want to focus on one spot and shoot as your subject gets there—and not have to refocus every time.
One way to handle the problem is to use manual focus. This requires that you turn the focus ring on the lens to manually set the focus. There is a danger here in that you may inadvertently change the exposure. (Don’t discount this, I’ve done it!)
But the biggest reason to avoid manual focus is that many of us don’t have the best eyes, and autofocus is just plain better. This is one of the few times I recommend an auto setting over manual.
A better way (than manual focus) is to use back button focusing.
What this does is remove the focusing function from the shutter button and move it to another button. Most DSLR cameras have added a button on the back of the camera for this function. (That’s why it is called back button focusing.)
In other words, once you set up your camera for back button focusing, when you depress the shutter half way, it doesn’t affect the focus. You can focus with the back button and the focus point will stay the same no matter how many shots you take and even if you change the exposure settings.
Photo by Tjarko Busink
Now, in that low light situation, you set the focus once and you don’t have to keep re-finding it. You can set your focus to have blurry shots if you want them, and pre-focusing on a certain spot is no problem.
It seems that the menu settings are slightly different for all the various models of camera, so it would be a waste to try and describe the settings here. Sorry, but you are going to have to bite the bullet and actually read your manual.
Once you’re comfortable with back button focusing, you will most likely leave your camera on those settings, but it can easily be changed back and forth to fit the situation.
Practice changing the settings back and forth so you are comfortable with them and can select the way you want to focus on any particular session.
About the Author
Dan Eitreim writes for ontargetphototraining.com. He has been a professional photographer in Southern California for over 20 years. His philosophy is that learning photography is easy if you know a few tried and true strategies.
Go to full article: DSLR Photo Tip: What The Heck Is Back Button Focus?
What are your thoughts on this article? Join the discussion on Facebook
PictureCorrect subscribers can also learn more today with our #1 bestseller: The Photography Tutorial eBook
The post DSLR Photo Tip: What The Heck Is Back Button Focus? appeared first on PictureCorrect.
The best thing about light painting is creative freedom. While we treat lack of light as a challenge in most genres of photography, that is totally not the case with light painting. Using your own source of light as a paintbrush, you gain the ability to paint whatever’s in your mind. You control what appears in the final image and are limited only by your own creativity. Take the following image by photographer Nikolay. The level of creativity is simply mind-blowing:
Nikolay shot the image on the Olympus OM-D EM1 with an 12-40mm f/2.8 Pro lens at f/3.2 and ISO 200 using the live composite mode. For the lighting, he used an LED flashlight and a double light blade.
While some can feel that the image is trippy with a psychedelic vibe, others feel it’s kind of spooky. It’s the look of an octopus in the middle of the woods that gives the eerie vibe to the image. It’s scary how it appears like the arms of an octopus emerging from the roots of the trees.
What do you see when you look at this image?
Go to full article: Interesting Photo of the Day: Light-Painted Forest Octopus
What are your thoughts on this article? Join the discussion on Facebook
PictureCorrect subscribers can also learn more today with our #1 bestseller: The Photography Tutorial eBook
The post Interesting Photo of the Day: Light-Painted Forest Octopus appeared first on PictureCorrect.
The world beneath the water’s surface is so amazing that you can rarely go wrong when capturing photos of it. Similarly, astrophotography is another genre that is not suited for everyone. However, in this genre of photography too, there’s a great potential to end up capturing images that are simply—and literally—out of this world. Let’s join photographer Pierre T. Lambert as he has his hands on with both of these fabulous genres of photography:
Lambert takes us through a spectacular behind the scenes journey of his beautiful trip underwater in a coral nursery. You can see in the video how he uses rolling waves, fantastic sunlight breaking into the water and beautiful corals to capture mindblowing images.
If underwater photography was not challenging enough during the daytime, Lambert also shows how he managed to take some more thought-provoking images during the night. The way he and his team work together is simply amazing.
Be sure to stick around until the end of the video. He also shares how he was able to photograph the Milky Way from the beach without a tripod. Can you believe that he shot those images at 1/5 seconds handheld and still managed to get some decent images? Kudos to his steady hands and the camera’s stabilization system!
Go to full article: Behind the Scenes of an Underwater & Astro Photoshoot
What are your thoughts on this article? Join the discussion on Facebook
PictureCorrect subscribers can also learn more today with our #1 bestseller: The Photography Tutorial eBook
The post Behind the Scenes of an Underwater & Astro Photoshoot appeared first on PictureCorrect.
Why photograph insects?
“Insect” captured by Paulo Brandao
Because:
Photographing insects is a specialized field and volumes have been written on the subject. However, there are four basics you need to know when you start and once you “whys” and “how to” of these, you’ll be ready to go deeper into special effects and also start experimenting on your own. Your camera manual and articles on macro photography will tell you all you need to know about macro lenses and close up filters, so we won’t go into all that here.
Sharpness is one of the most important facets of insect photography. We’ve all seen images of flies and other insects where the minute hairs on the body are visible. Without this effect, the whole impact of the image is lost. The easiest way to ensure sharp focus is to use the auto focus option on your camera. When doing macro photography, even the slightest bit of hand shake can change the depth of field and affect the sharpness of the image, so any shake after the auto focus is complete will affect the picture. Use the normal technique of half pressing the shutter button to start the auto focus and take the picture as soon as possible. To minimize handshake, use a minimum shutter speed of 1/125 of a second.
Lighting is a common problem in insect photography. Of course you can use a flash, but the problem with using a flash with macro against brightly colored plant backgrounds, which happens in most insect photography, is that the natural colors are sometimes lost. With a 1/125 of a second shutter speed, an insect that is not well lit may cause the auto focus to fail. In that case, try manual focus, and if that still doesn’t look good, go in for the flash option.
“Locust” captured by Rego Korosi
Once you have your subject in proper focus, the next thing to do is look at the background. A blurred background will keep the attention on the insect. The easiest way to do this is to use the maximum possible zoom. A plus 10 macro lens at 84 mm focal length and a plus 4 lens at 210 mm will result in the same magnification but the latter option will produce a smooth, blurred background effect. Another thing to remember is that the greater the distance between the subject and the background, the more blurred the background becomes.
The final issue is framing. For the best effect, try to capture the insect from the front but at a slight angle. This will allow the head to be seen in relation to the body and keep the image in balance. With few exceptions, photos of an insect’s back are not of any great value. Keeping the insect slightly off center in the photo will yield positive results. Try using the “rule of thirds” for this.
“Om nom nom nom” captured by Erica Annie
Once you’re producing good results with these three techniques, you can start looking at experimenting on your own.
About the Author:
Peter Timko writes for Proud Photography, an online photography school.
Go to full article: Insect Photography Tips
What are your thoughts on this article? Join the discussion on Facebook
PictureCorrect subscribers can also learn more today with our #1 bestseller: The Photography Tutorial eBook
The post Insect Photography Tips appeared first on PictureCorrect.
Due to the relative motion between the Earth and the core of the Milky Way, we cannot always get a perfect view of the majestic night sky. It’s between March to October that the core comes out prominently. This year, October’s new moon was one of the best times to catch a view of the magnificent beauty. And photographer Jake Messner was in no mood to let it pass without photographing it. So he headed out to explore some beaches near Santa Cruz, California, and was able to capture the following beauty:
This is a nine-image panorama that he shot using a Sony A7III with a Sigma Art 50mm lens and a startracker. He shot 90-second exposures for each frame of the Milky Way at f/2.2 and ISO 500. And for the foreground, he shot a 20-second exposure at f/3.5 and ISO 100. Since he took the image right after twilight, we can see some illumination from the recently set sun on the landscape.
It’s fantastic how dense and bright the core appears to be in the image. Messner has done an absolutely great job in finding the right composition. It’s clever how he used the two rocky structures to frame the gigantic Milky Way core. Also, looking at the way the core seems to meet the Pacific far into the horizon, we can analyze the image in two ways: either the stars are being poured into the ocean, or being pulled out of it. Which would you like to believe?
Go to full article: Interesting Photo of the Day: Milky Way from Santa Cruz
What are your thoughts on this article? Join the discussion on Facebook
PictureCorrect subscribers can also learn more today with our #1 bestseller: The Photography Tutorial eBook
The post Interesting Photo of the Day: Milky Way from Santa Cruz appeared first on PictureCorrect.
Backgrounds play a pivotal role in studio photography. They play a subtle yet very important role to help fill out evocative portraits. They complement the subject, adding a sense of depth and creating a certain mood. When selecting the background for your studio, using fabric can be a great idea. There is a variety of colors and patterns to choose from. However, making a fabric background that actually looks good is a bit tricky. In this video, photographer Gavin Hoey from Adorama shows how you can make a crease-free fabric background, and also shares ways you can create different backgrounds using the same fabric:
One major challenge you’ll face when using fabric for your studio background: creases. They may not appear when you look at the background straight, but they’ll surely be visible when the background is lit from the sides. In this context, Hoey shares a very handy tip: get yourself a fabric that’s a bit stretchy. This way, you can easily tackle the creases by stretching it using clamps, light stands and poles.
Hoey further demonstrates how the position of your lights affects the appearance of the fabric background. The closer the light is to the background—and the smaller the angle is between them—the greater are the chances that the imperfections will show up. So be very careful when setting up your lighting.
Toward the end of the video, Hoey also shares two great tips on how you can use the same fabric backdrop in other ways to achieve an entirely different look. Be sure to watch the complete video. We’re sure you’ll love it—especially if you’re setting up a small studio on a budget.
Go to full article: Creative Tips on Using Fabrics for Studio Backgrounds
What are your thoughts on this article? Join the discussion on Facebook
PictureCorrect subscribers can also learn more today with our #1 bestseller: The Photography Tutorial eBook
The post Creative Tips on Using Fabrics for Studio Backgrounds appeared first on PictureCorrect.