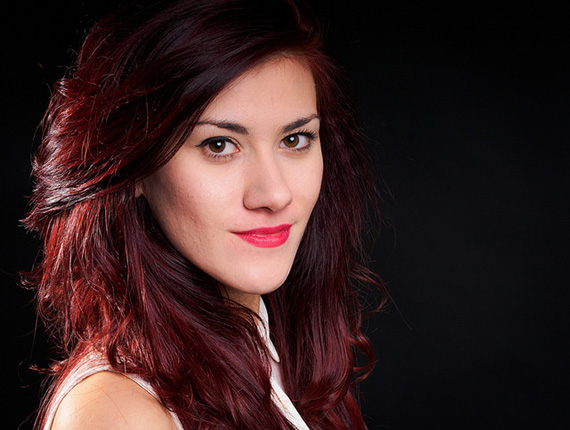
I’ve previously discussed the importance of catch lights. Without them, your subject’s eyes look dull and lifeless. They help add interest to portraits and are a very effective way to add depth to the eye.

photo by Victor Semionov
Catch Lights
Ideally, catch lights should be round. This tends to be the most natural and visually pleasing shape (reflections of the sun are round, and we are used to seeing the round shape). The shape of your catch lights is generally only a problem if you are using a square reflector or diffuser. If you are going for a contest winner, you will want to retouch your catch lights to make them round.
Be careful about the number of catch lights visible in the eye. Your fill light or reflectors will add additional catch lights to the eyes. You usually only want one in each eye. Retouch or adjust your lighting to remove any extras.
Lastly, the catch light (ideally, provided by the main light) often looks best at the 11:00 or 1:00 o’clock position within the subject’s eye. Knowing this will help you determine how high to place the main light. It should be at about 45 degrees from the axis between the camera and the model and high enough to be slightly above their head.
Every face is different, so watch the shadows and catch lights to determine the right placement for the lighting pattern–shadows to determine the light pattern, catch lights to determine the height of the light source.
Glasses
Reflections in glasses can kill a portrait faster than just about anything else. Here are a few pointers:
The first thought that many of us have is to just take the photo with the subject not wearing glasses. This can work–or it can be a problem.
If the subject does not normally wear glasses (they may habitually go without them or they may usually wear contacts) go ahead and shoot without them. If the subject normally does wear glasses, and you shoot without them, no one is going to like the portrait. The person in the photo won’t look natural. Plus, their eyes might look slightly unfocused or even crossed.

photo by Ryan Ritchie
Rule of thumb: if your subject shows up for the portrait session wearing their glasses, leave them on.
Since the lights are generally higher than the subject’s head, one way to avoid glare from the glasses is to raise the part of the stems going back to the ears. The hooked part will be raised half an inch or so above the ear. This tilts the lenses down and can eliminate glare.
If tilting the glasses doesn’t eliminate the glare, you may have to raise the lights. Be careful about tilting the glasses too far; it looks odd if you overdo it.
Lastly, you can actually take the lenses out of the frames and have your subject wear the empty frames. This is a method that’s been touted by photographers for decades! For most eyeglass frames, it is easy to remove and replace the lenses with an eyeglass screwdriver kit. It would be worth your while to get one and keep it in your camera bag.
Be cautious though. If you break or scratch your subject’s glasses, you could end up buying him or her some new ones. You will drop the screws, so have extras on hand.
Catch lights and glare prevention need not be complicated. Make sure your catch lights are the right shape and in the right location, watch for glare in your model’s eyeglasses, and you’ll be quick to improve your portrait photography.
About the Author:
Dan Eitreim writes for ontargetphototraining.com. He has been a professional photographer in Southern California for over 20 years. His philosophy is that learning photography is easy if you know a few tried and true strategies.
Go to full article: How to Handle Catch Lights and Eyeglasses Glare in Portrait Photography
What are your thoughts on this article? Join the discussion on Facebook
PictureCorrect subscribers can also learn more today with our #1 bestseller: The Photography Tutorial eBook
The post How to Handle Catch Lights and Eyeglasses Glare in Portrait Photography appeared first on PictureCorrect.
from PictureCorrect https://ift.tt/2ujcwRK
via IFTTT


0 comments:
Post a Comment