

This article is based on concepts from The Photography Action Cards if you want to dig deeper for further training.
What is a ‘low key’ photographic image? There seems to be a lot of confusion about this. So, let’s start with a definition.
‘Low-Key Lighting’ is where the term originates. The concept of low-key composition dates back to the earliest painters of Europe. However, the term ‘Low-Key Lighting’ was popularized by the American television and movie industries.
Low-Key lighting is characterized by using a high contrast lighting scheme that utilizes only one light to light a scene. And, the subject is predominantly composed of black or very dark tones.
NOTE: Traditional photographic lighting includes a 3-point lighting scheme – Key Light (Main), Fill Light (for shadows), and Backlight or background light (to define edges).
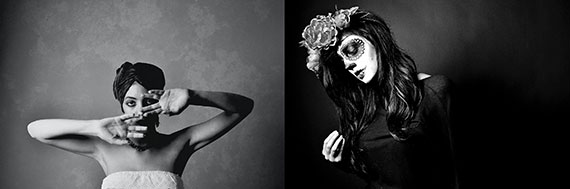
In the above example photos, the right image is a low-key shot, and the left image is not.
Let’s confirm that by definition.
The right photograph is lit by one light, and the scene is predominantly black or very dark tones.
The left photograph is lit by one light. However, it isn’t a scene of mostly black and very dark tones. The subject area is primarily mid-tone gray. The left example would be characterized as a full tonal scale monochromatic photo.
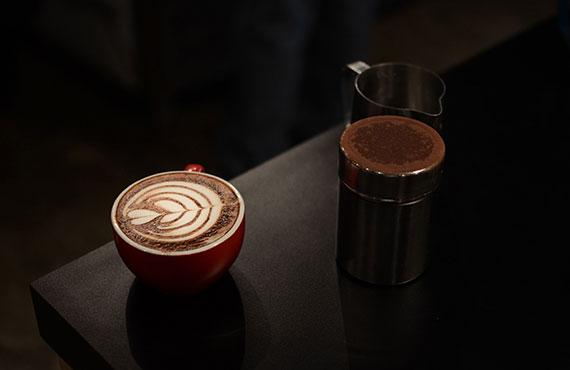
Photo by karl chor
The low-key effect is often found in black and white portraiture. However, it’s not limited to just that genre. You can use it for any type of photography, including color photography.
IMPORTANT: these traits contribute to the very best low-key photographs.
√ The shadows should be very dark but open. This means that you should be able to see details in all but just the very darkest, most shaded areas.
√ Some smaller area of the frame should contain tones that are near white. In the first example, it’s the woman’s face in the right-hand photograph. In the second example, it’s the decorative foam in the cup. The white highlight area is essential to a low-key photo because it gives the image a full tonal range. You have dark areas and you have a light area, but you’ve skipped most, if not all, of the mid-tone areas. Without this element, you’ll have simply created a ‘dark’ picture.
√ The low-key effect instills a mood of mystery and suspense. Picking subject matter and composing in a less literal sense is often effective for this technique.
√ The dark tones set the mood, but the highlighted area directs the eyes. Make sure that the highlighted area is part of the subject or near the subject, where you want a viewer’s eyes to come to rest.
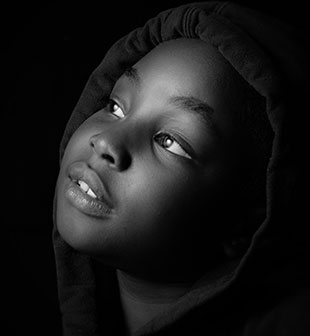
Photo by Wadi Lissa
Getting Started
• You need a dark background. This could be a dark-colored piece of cloth, paper, or board. It could be a wall in a darkened room. You want it to be very dark, as close to black as possible.
IDEA: Black velvet cloth is the ultimate black background. It photographs as near absolute black, even when a light is hitting it.
• You need a light source with which you can control the spread of the light. This doesn’t have to be fancy. It could be a flashlight, or a lamp, or sunlight filtering through a crack in the window blinds.
• OPTIONAL: Some larger pieces of cardboard, cloth, or any opaque object that you can use to block off portions of the light is beneficial. It allows you to control the spread of the light source. In professional photography, these are known as ‘flags.’ They flag the lighting off of areas that you don’t want lit.
IDEA: Take a moment and study the portrait of the child. This is an exquisitely produced low-key portrait. Take notice of the following:
• You can see into the shadows. You can see the child’s ear beneath the hood. Controlling your shadow density is an integral part of low-key photography.
• The brightest white area within the picture is the highlight in the eyes. The photographer masterfully controlled where a viewer’s eyes will come to rest within the subject’s eyes.
Picking Your Subject
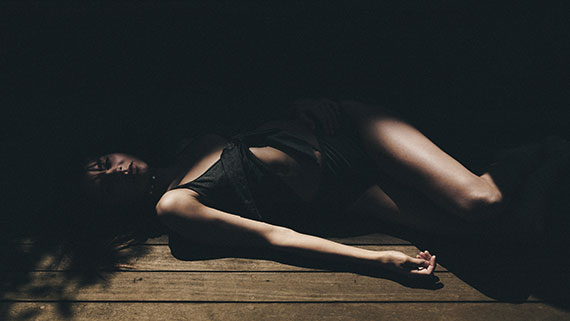
Photo by Vinicius “amnx” Amano
When selecting your subject matter for low-key photos, think DRAMA!
In the above example photo, take notice how the set for this low-key photograph was created outdoors.
The photographer found an area of intense lighting that was being filtered through trees and other objects. They then carefully placing the model into the line of demarcation between light and shadow.
There’s drama in the lighting, the subject, and the pose. This creates a fabulous low-key photograph.
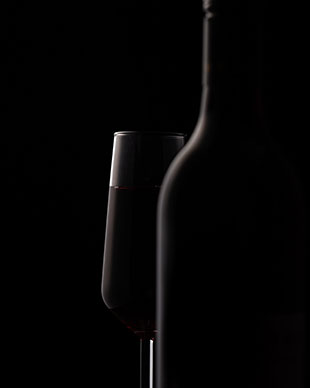
Photo by Mae Mu
Low-key photography is very adept at accentuating the shape of a subject. When picking out your subject matter, think about the edges of your subject and its form when setting up your lighting and background.
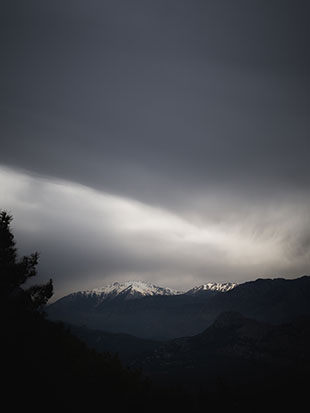
Photo by Alexander Lyubavin
Even landscape photographers can create low-key photography.
When looking for low-key opportunities in landscape work keep in mind the following:
√ Some of the best opportunities will present themselves either right before or right after a storm.
√ You will also find opportunities at sunset and sunrise, especially in backlighting scenarios.
√ A cloudy sky, with breaks in the density, is usually essential to create dark or black tones within the sky.
√ Most landscape photography will require some post-processing steps to solidify the low-key effect.
Post-Processing
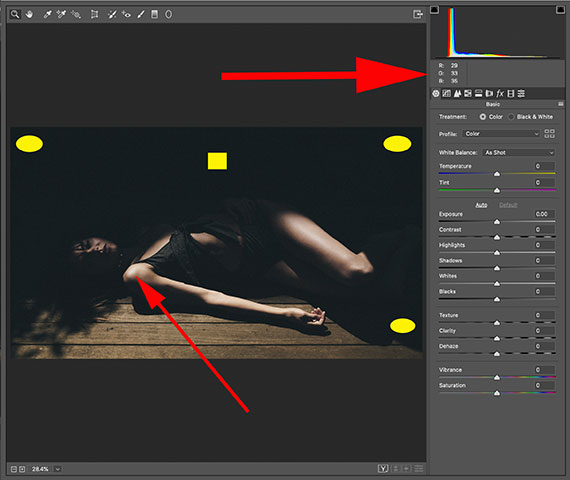
Key Thought: The screenshot above provides you with the following information.
The yellow square is where I placed my cursor to show you the RGB numbers, as indicated at the upper right red arrow.
This area appears black.
However, notice that the numbers are hovering in the high 20s and low 30s. If that area were absolute black, the numbers would read 0,0,0.
In low-key photography, you don’t want the majority of the black or dark areas to become that dense.
The very darkest black area can be 0,0,0 (clipped), but I prefer 8,8,8, and that would be in a non-important area- away from the subject as indicated by the yellow ovals.
An expansive black area, like the background in the shot of the model, should read between 12,12,12 and 50,50,50. The mind registers this area as black, and the setting doesn’t block up the shadows.
The smaller red arrow points to the brightest spot within the photograph.
Two important points are evident here. Your brightest area needn’t be absolute white, but it should be close to that in tone.
Absolute white registers in RGB as 255,255,255. The area on the shoulder reads 228, 221, 204.
Ideally, you want the brightest region to be above 200 and below 255.
I also want to point out that the bright area on the shoulder isn’t exactly where the eyes are supposed to come to rest.
But it’s very close to the face, which is the ultimate stopping point. In this case, the shoulder serves as a focal point to the face.
The landscape photo that we viewed previously was very close to a low-key image as it was shot.
However, post-processing helps to firmly kick it into the genre.
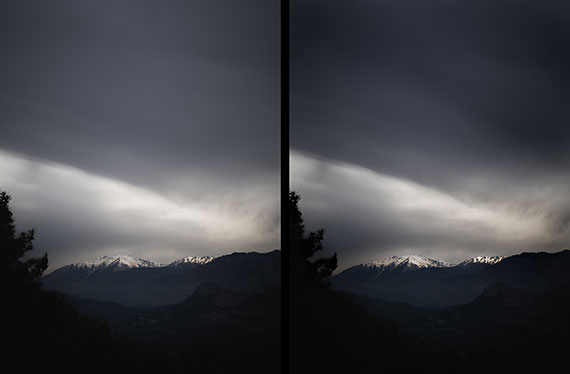
The original is on the left, and the post-processed version is on the right.
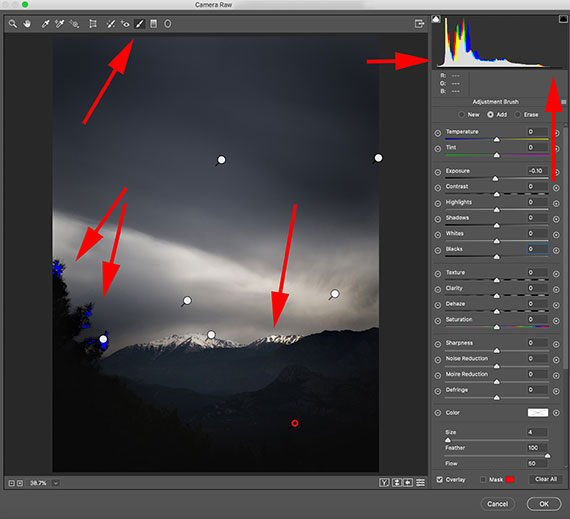
Key Thought: For low-key photography, post-processing with the adjustment brush is your most significant and best friend. It allows you to locally finesse the various tones within your picture.
In the above screenshot, each pin represents a localized adjustment that helped bring this photo closer to a truer low-key representation.
The upper left red arrow indicates where you can find the Adjustment Brush in the Adobe ACR workspace.
From the screenshot take notice of the following:
• Only a small -0.10 global exposure adjustment was made.
• The red arrows on the left show a small amount of black clipping (0,0,0) in an unimportant area, which we discussed earlier.
• The final red arrow indicates the brightest area in the frame at the top of the mountain peak.
Let’s look at that bright area more closely.
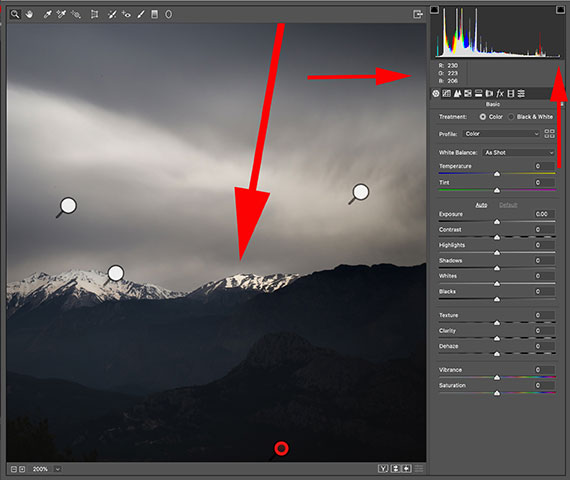
The brightest highlight area reads 230,223,206. This means that this area isn’t absolute white.
Why is that you might ask – it looks like it should be absolute white.
Rarely does a highly noticeable absolute white or absolute black area look good in a photo.
For example, if that area were absolute white, it would look unnatural. The subdued lighting that was present would not create absolute white.
Remember: You want the brightest area of a low-key photograph to be the final resting spot, or very near the final resting spot. The brightest spot should read above 200 but less than 255. Keep an eye towards realism!
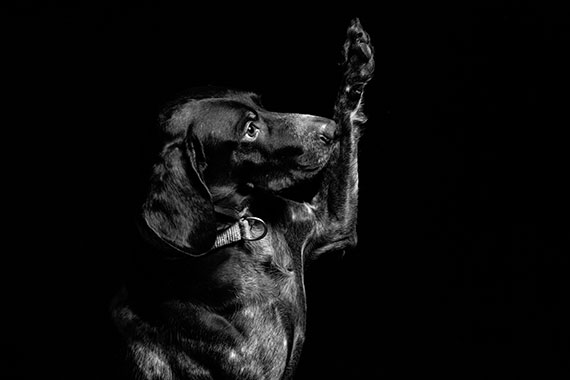
Photo by Fabian Gieske
But what about the camera gear?
You can produce low-key photography with any camera.
Simply assemble the necessary elements:
√ A dark background
√ A subject that is mostly dark or black tones
√ A single light source that offers some aspect of a controlled lighting beam
√ Some flags are helpful
√ A simple post-processing tool
Even free smartphone apps like Snapseed can work for post-processing.
How about some final Inspiration?
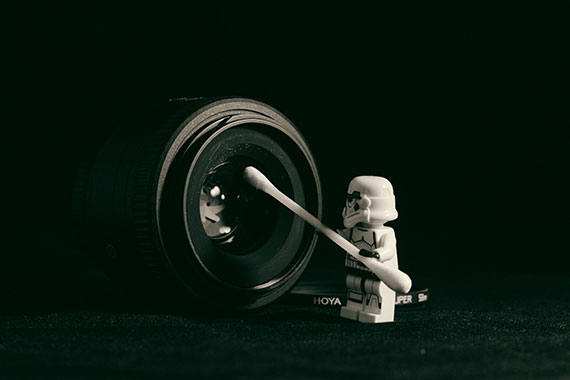
Photo by James Pond
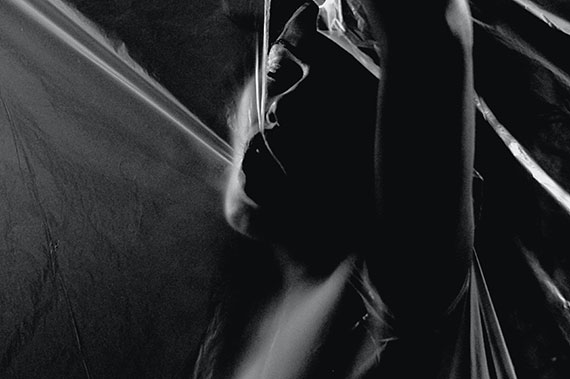
Photo by Emiliano Vittoriosi
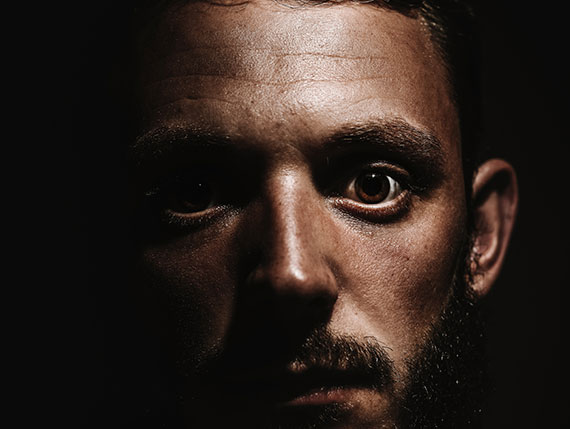
Photo by Alexander Andrews
About the Author:
Kent DuFault is an author and photographer with over 35 years of experience. He’s currently the director of content at the online photography school, Photzy.
For Further Training and Exercises:
65 beautifully designed & printable Photography Action Cards are now available that will give you over 200 photography assignments, covering everything you can imagine. They are currently 88% off today if you want to try them out.

New: The Photography Action Cards (Click to See How They Work)
These Action Cards discuss a photographic topic, provide you with suggested considerations, and give you specific photographic assignments.
Deal found here: The Photography Action Cards at 88% Off
Go to full article: Low Key Photography Tips
What are your thoughts on this article? Join the discussion on Facebook
PictureCorrect subscribers can also learn more today with our #1 bestseller: The Photography Tutorial eBook
The post Low Key Photography Tips appeared first on PictureCorrect.


from PictureCorrect https://ift.tt/2N0HhDj
via IFTTT


0 comments:
Post a Comment